
Making my own backdrop for flower photography
I always want to do better, I love learning new things and I’ve been seeing a lot of stunning backdrops used on Instagram for flower photography. Until now I’ve always used a wall inside or out to photograph against. So, I thought that I’d give one a go. Now, it would obviously be easier to go on a course but, well, that costs money, so I looked at a few you-tube videos. There’s only so many that I can watch before I feel like I’m being told the same thing in different ways but not how to actually do it and I find that the best way to learn is to just give it a go!
I had a cheap canvas that I’d bought last year and had taken some photos on but as an amateur I find White so hard to photograph. It always either glares on blurs or both.

I heard in lots of the videos that the backdrop needs to be ‘primed’ first before painting. Now, my experience in art is very limited so I didn’t really understand what that meant but it seemed that a canvas is already primed so I just started painting.
I had some normal house tester paints in the shed and as the canvas was small thought they would do. As it’s Spring I thought pale Blue and Yellow would look pretty with the undertone of Green suiting the flowers. I had seen people using rollers but I didn’t have one small enough and so thought a big brush would do the job.

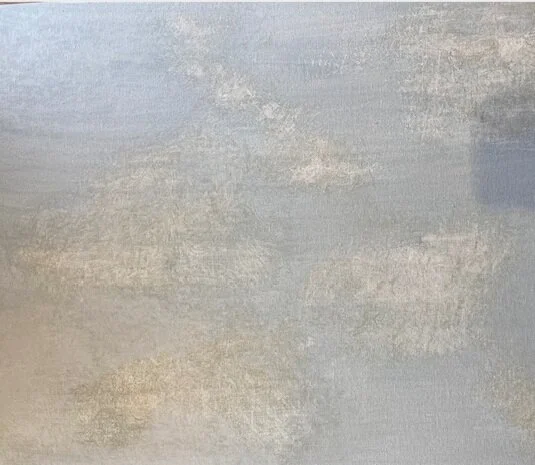
DIY painted backdrop for flower photography
I decided to paint a very very watered down mix of the Blue all over the canvas first using the brush and let it dry. It was a bit too pale and so did another coat. I then watered down some Yellow and tried to paint areas over the top.
Erm, well, that didn’t quite work. I just ended up with lots of lines and it looked a bit ‘muddy’
DIY painted backdrop for flower photography
So, then I tried ‘dabbing’ instead of painting. With some kitchen towel, I used the watered down mix and lightly dabbed it just on the Blue areas. It probably took about another 3 coats to but I eventually started getting closer to the look I wanted. I then also did the same with the Yellow and just lightly dabbed over the areas to try and achieve a look that I liked. I wasn’t really too sure what I was aiming for because it’s not something I know anything about so I just kept going until I liked it.
Would I recommend going on a course. If you have the money then definitely yes! Or, would I recommend just giving it a go. Why not! Next time, I’m going to try and be a bit more confident with more colour and see what happens and I’m sure that the more I do it and the more I experiment, the more I’ll make sense of it. My patient side completely enjoys the process of trying and learning. My impatient side just wants to know how to do it well now!
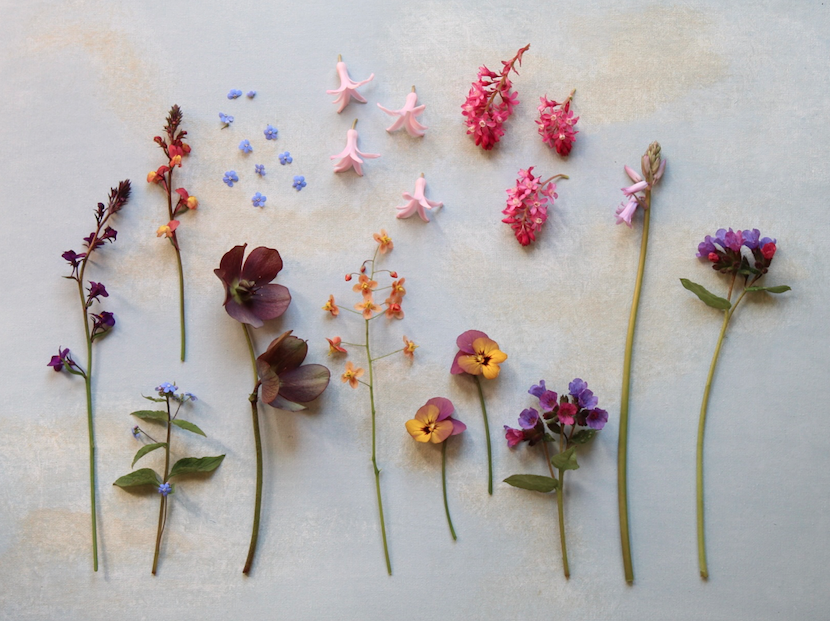
Here are the final results and as a bonus, I also found a new function on my camera for close up photography.

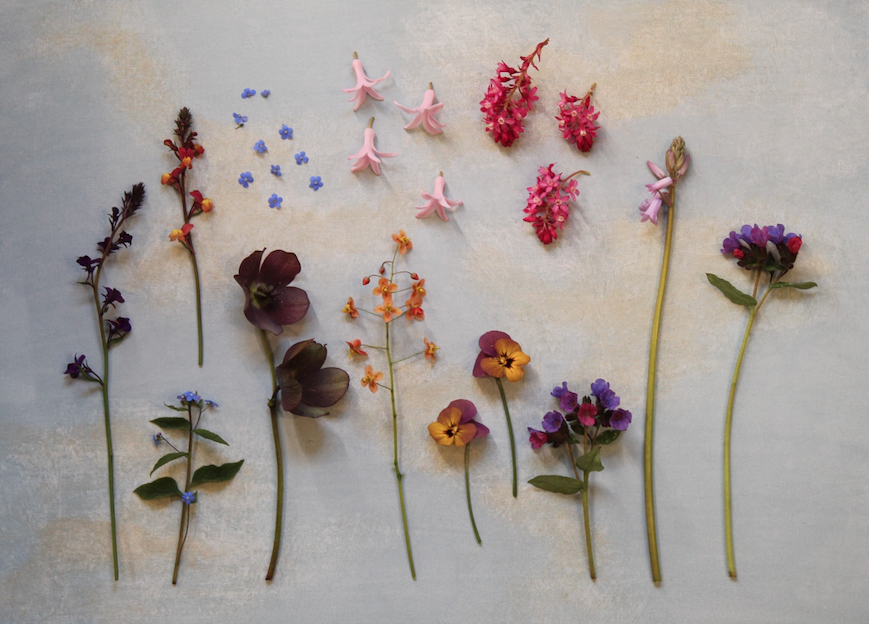

Spring flower Epimedium

Spring flower Pulmonaria
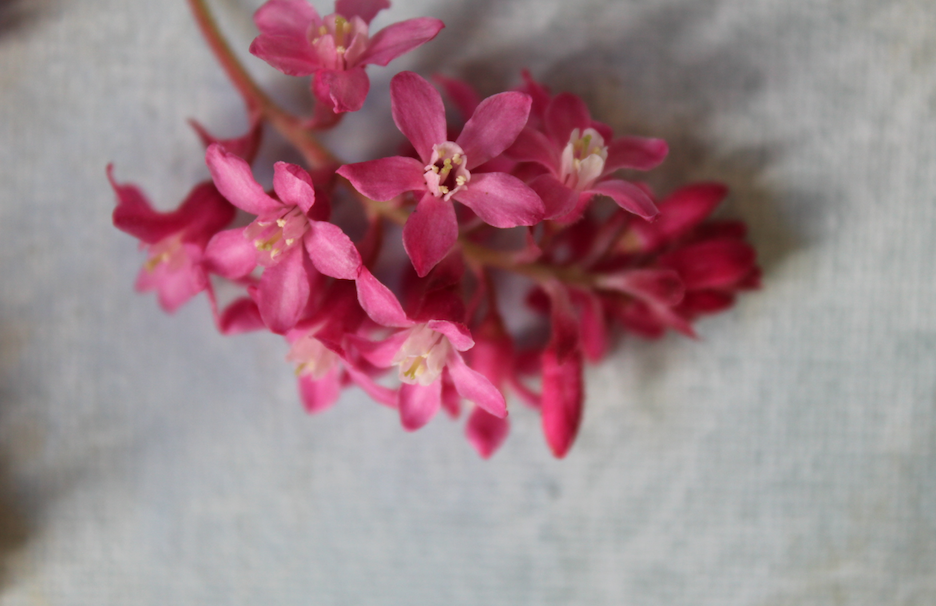
Spring flower Ribes Sanguineum

Spring flower Brunnera
